The weekend job that'll save money all year: DIY ceiling insulation
The weekend job that'll save money all year: DIY ceiling insulation
Home comfort tips
Ceiling insulation can make a huge difference to your electricity bills and comfort, and it's not that hard to DIY. Read our step by step instructions & watch the how-to video.
On a hot summer day, an uninsulated ceiling can be responsible for as much as 35% of your home’s heat gain. And in winter, the same uninsulated ceiling will let out up to 35% of your warm inside air. Pick up some ceiling insulation batts from a local stockist, or order them online, and find out how easy it is to install on the weekend. You’ll be amazed at the added comfort when the winter chills hit, or when the summer sun is beating down on your house – plus you’ll save money all year on your heating and cooling bills.
Project List:
- Retractable utility knife and a tool for creating a straight edge
- Step ladder if needed to access the roof space
- Torch or lamp for lighting
- Sturdy kneeling board to lay across beams
- Broom handle or other long non-electrical conductive poker (not metal)
- Gloves, dust mask and long sleeves to reduce temporary irritation
- Ceiling insulation batts
Step 1: Measuring up
Before ordering your insulation from your local stockist or online, you need to calculate how many packs you need.
- Measure the distance between your ceiling joists. Measure to the centre of the joists and remember, the distances may vary so make sure you measure them all. This will tell you what width of ceiling batts you will need:
- If your joist centres are 450mm wide, purchase 430mm batts
- If your joist centres are 600mm, wide purchase 580mm batts
- Batts can be easily trimmed using your knife and straight edge to fit odd distances.
- Determine what R-Value you need. Generally speaking, the higher the R-value, the better the insulation. Insulation won’t turn your home into a hotbox – in summer and winter, it’ll stop temperature from transferring into your comfortable living areas. However, if you use a high R-Value, the thickness of the batts may mean you’ll need to consider getting some perimeter batts to fully cover the area. See Handy Tips below for more information.
- Roughly measure the area you need to insulate. You can either get this from your house plans or you can measure the area and work out the m2 required. This will tell you how many packs of batts you need.
- Look at the coverage per pack for the batt you’re going to buy. Divide the area to be insulated by the coverage per pack. Round it up and you’ve got the number of packs you need to buy.
Tip: It’s always a good idea to get an extra pack above the minimum required, in case you need to cut batts. Nothing’s more painful than finding yourself short halfway through the job!
Step 2: Preparing for installation
Being prepared isn’t just a Boy Scouts motto – it’s crucial for the success of any DIY job. Take these steps and you’ll be good to go:
- Don’t choose a hot day to install – you’ll fry up there in the roof. If it’s summer, do the job early in the morning before the heat has built up. And take some water up there with you, it can be a thirsty job.
- To be safe, turn off power at the fuse box before commencing installation, and place a warning tag on it so nobody mistakenly turns it back on while you’re working.
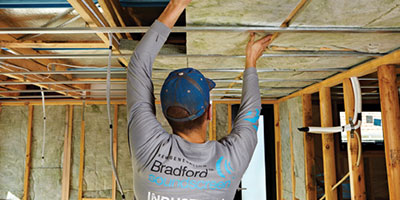
Step 3: Installing the insulation
Once you get started, you’ll be surprised how straightforward this job is:
- Take your sealed packs into the roof and open them there. They’re going to expand a lot and you don’t want to be dragging individual batts up a ladder. Open the packs with your utility knife, drawing it down the side of the pack.
- Don’t stand on the ceiling plasterboard – only on the joists or use your kneeling board. Position your kneeling board over at least two joists for maximum stability.
- Start from the outside of the roof and work your way back to the access point. Don’t forget your perimeter batts if you’re using them!
- Push your batts out towards the eaves so the first batt is 50mm across the top plate (edge of the outside wall) but remember the 20mm gap between roof and batt. Use your poker to push them into limited access areas.
- Fit the batts snugly between the ceiling joists onto the ceiling plaster, and butt them up against each so they’re firm but flat.
- Fill in any gaps with offcuts or trim a piece off another batt.
When you’re done, have a shower to wash off any skin irritation, enjoy a cool drink and pat yourself on the back. Job well done!
Handy tips:
What else is in your roof that you need to be careful of?
If you have air-con ducting in your ceiling, just lay it on top of the insulation batts. Batts can be laid over electrical wiring but should be cut around downlights. In Australia, a clearance of 50mm around the perimeter of the downlight fitting is required to help dissipate any heat. And don’t block any ventilation openings, like ceiling or eave grilles. Getting that fresh air into your ceiling is a key part of keeping your home comfortable year-round.
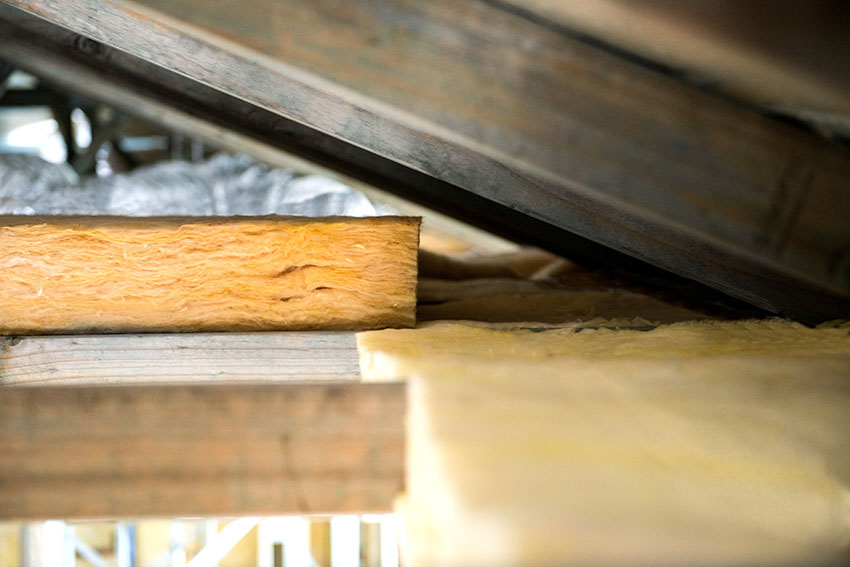
Installing right to the edges
Insulation should be installed right to the eaves so the batt is 50mm over the outside wall. However, you need to leave an air gap of 20mm between the insulation and your roof. Standard R3.5 ceiling insulation batts are 185mm thick, so depending on the roof pitch the batts may touch the underside of your roof at the edges of your ceiling. If so, we recommend you purchase some higher-density wall batts to fill in around the ceiling perimeter, then use the R3.5 ceiling batts for the rest of the space where there is enough clearance. This will ensure you get the best possible performance from your insulation.
Low-pitched roofs or reduced access
If you have a very low-pitched roof or reduced access, you may need help from a specialist installer. Talk to the experts at your local stockists, or call Bradford on 1300 760 233 for advice.